It has been nearly six months since my first attempts at building a complete, multi-purpose event production kit. Every activation brings a unique set of client expectations and needs and provides an outstanding learning and growth opportunity. As 2020 draws to a close, it's a great time to look at the StudioKurcan Remote Studio Deployment Kit's continued development and current state.
The SK-RSDK Mk V streamlines input and output schemas and has a quicker setup and activation time than earlier builds. In earlier iterations, laptop processor & graphics card stress was a huge pain point. After many rounds of testing and tweaking, it became clear that we either needed to invest in highly optimized (and costly) workstations or find another way.

On location at the Super Summer Theatre Studios in Las Vegas, NV.
Keep It Simple, S--- Well, you know.
Simplifying audio and video conversion became a priority. All video encoding and overlay compositing are now handled via the ATEM Mini Pro switcher in Mk V, resulting in less laptop processor stress. Audio signals also enter the system at the ATEM Mini Pro, fed by the Zoom LiveTrak L-8. This move was critical to improving not only system performance but audio quality.
Reaper 64 is a fantastic piece of software and certainly has a place in recording workflows. However, with the computers I have, leaving a session open and encoding for upwards of 1 hour resulted in audio cracks, blips, and synch issues. The Zoom LiveTrak L-8 has eight inputs; plenty of rooms for microphones, video playback, and IR cues. I also love the on-board effects, three discrete monitoring universes, and the built-in audio recorder. It can work as a USB interface, but again, reducing computer processor strain is the goal.
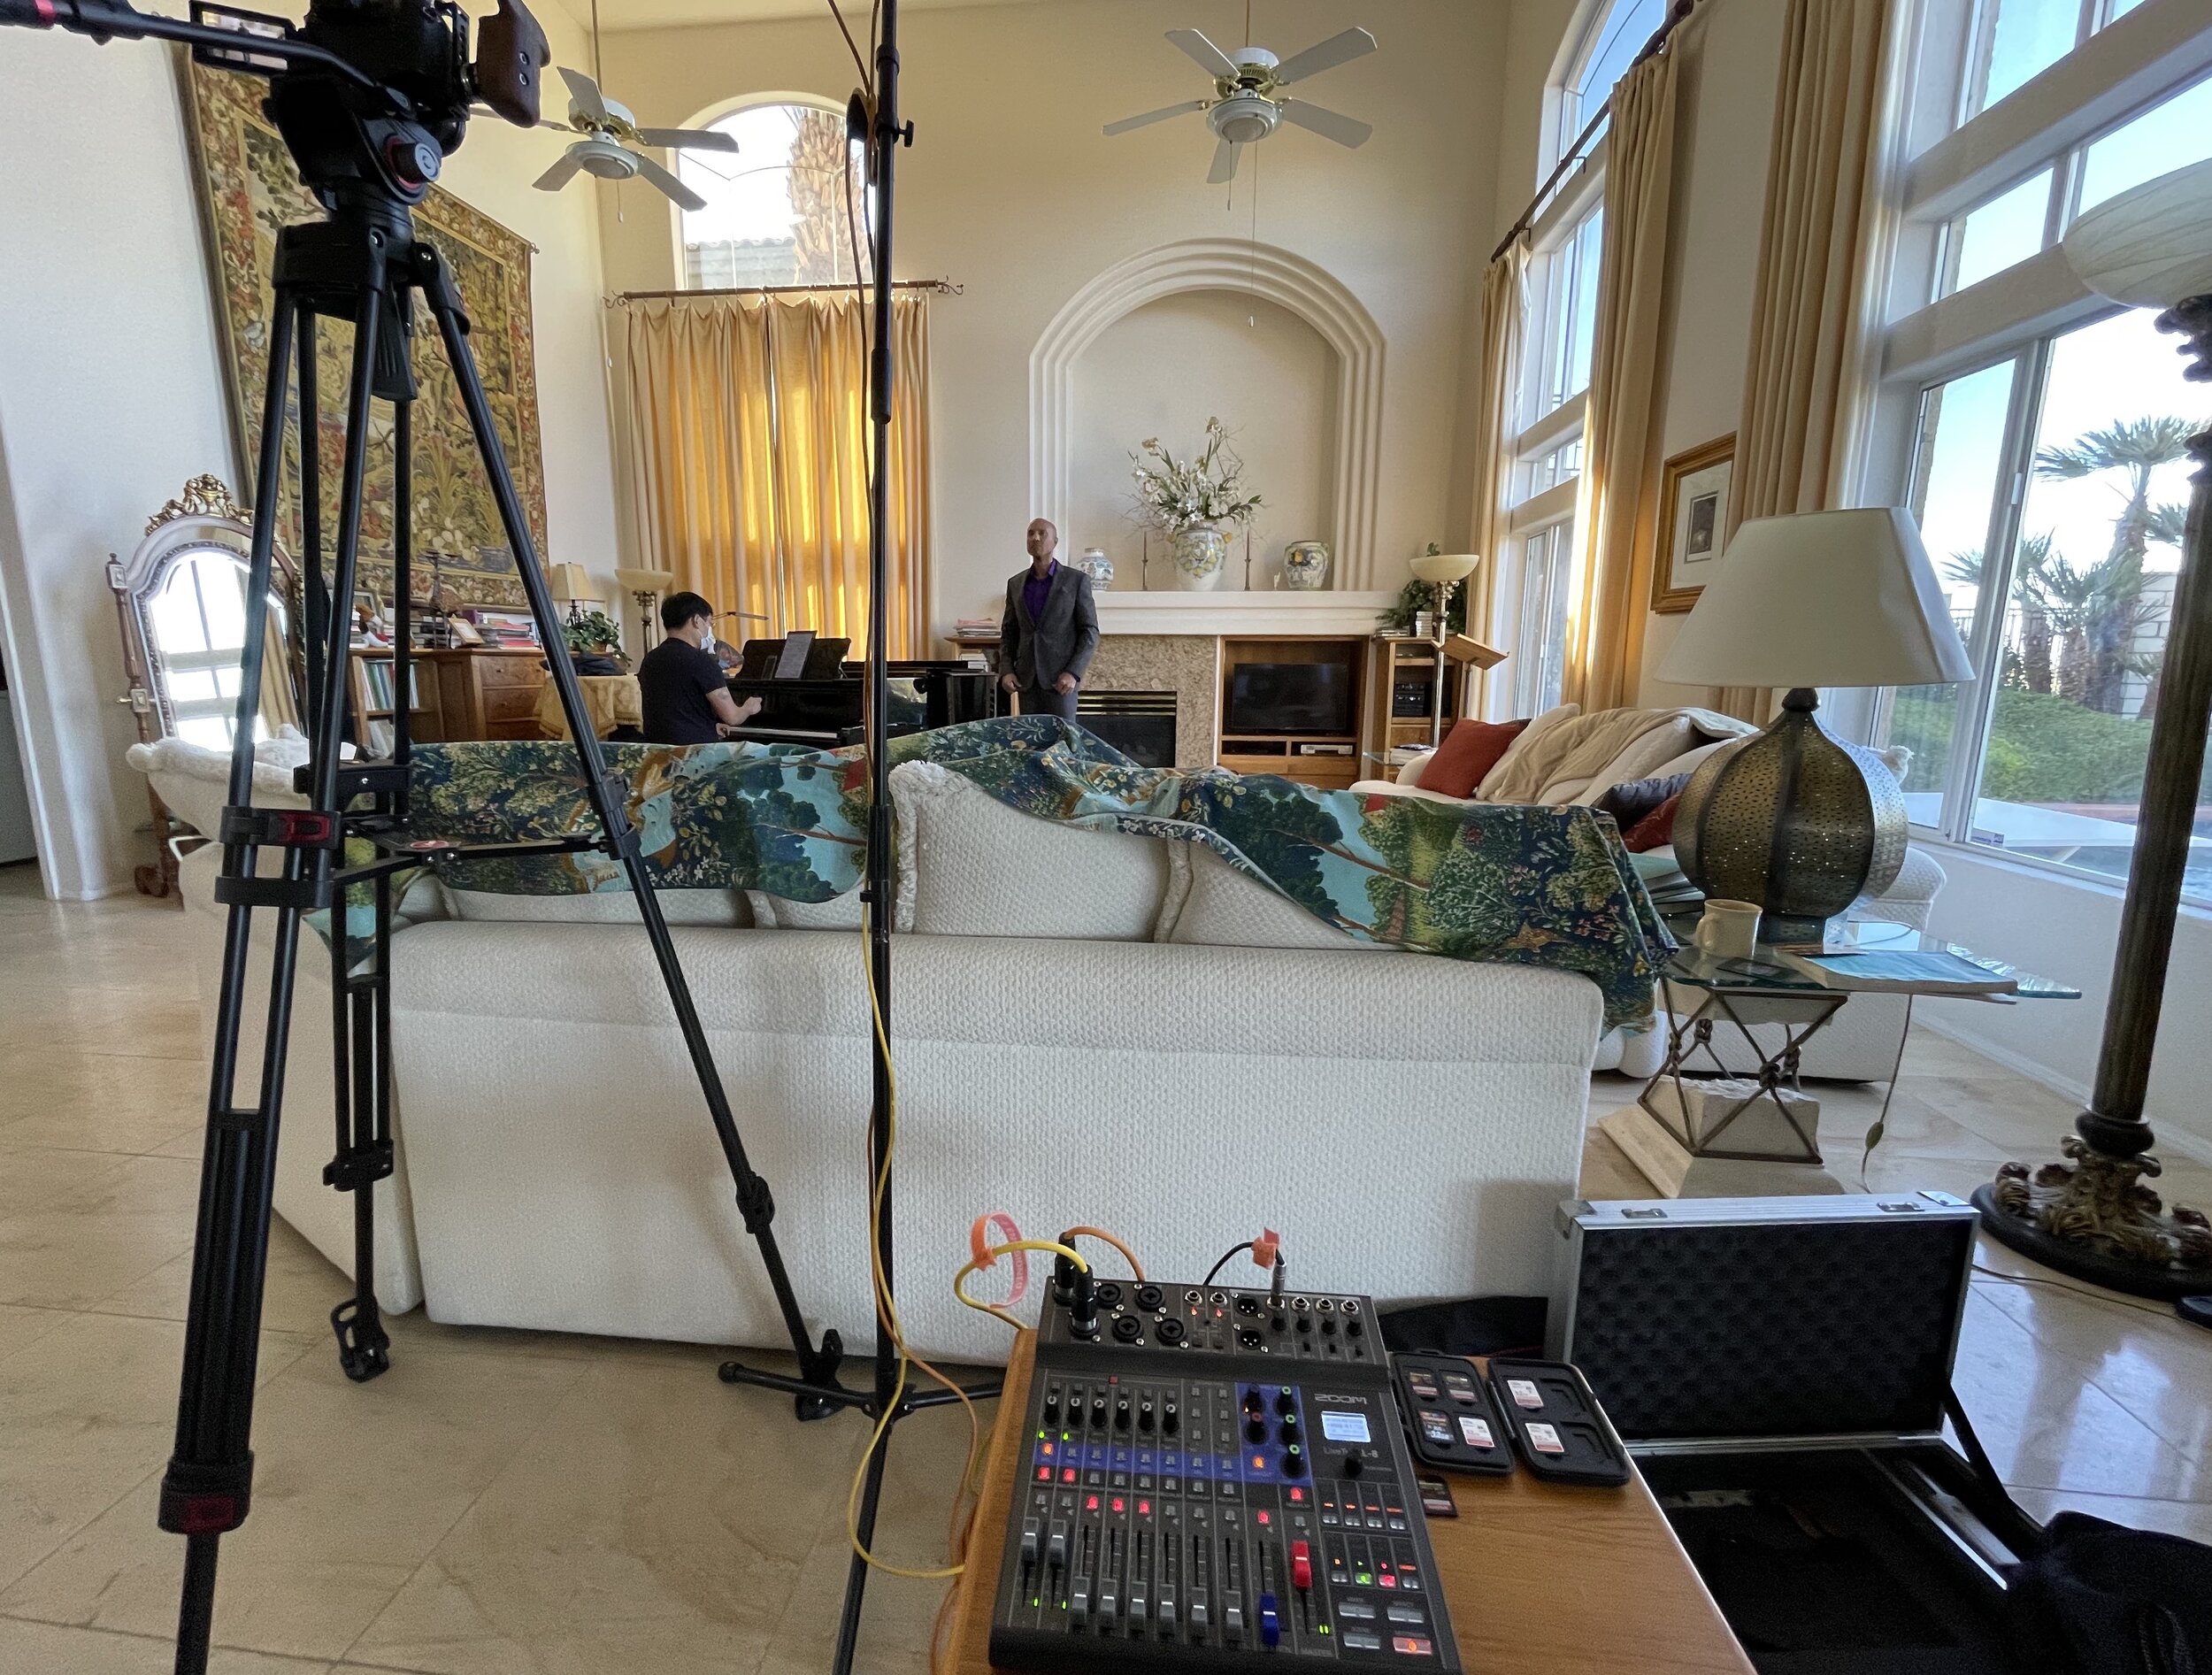
My Zoom LiveTrak L-8 perfectly capturing a phenomenal musical duo!
The ATEM Mini Pro is a little workhorse! Its four HDMI inputs easily handle up to three cameras and graphics/playback/overlays from a laptop running qLab and OBS. Moving to utilize only the "projector out" from OBS frees up so many system resources. Overlay presets send with chroma colors built-in for ATEM removal, and video playback runs through qLab via Syphon & Soundflower.
This switcher can record, stream, has a ton of built-in effects, and is controllable with the ATEM Software Control app. It uses XML tables for presets, TCP control, and can easily integrate into full ATEM Production Studio environments. Streaming to RTMP platforms from the ATEM Mini Pro's ethernet port is straightforward, and the whole unit is viewed as a webcam when connected to a Mac or PC via the USB-C port (only qualm here, you cannot record to an SSD and connect the switcher as a webcam). I use this option when sending an activation over conferencing platforms such as Zoom.

The SK-RDSK Mk. V wiring diagram.
More Buttons, More Problems?
If you've read my earlier posts on the SD-RSDK, the number one consideration in the build is that I'm often on my own to run everything. And while the Mk V solution works so much better, adding in the ATEM Mini Pro and the Zoom LiveTrak L-8 adds more buttons to push, mis-push, and things to control!
TouchPortal was an excellent solution for earlier versions of the setup. It is easy to set up, but the program has issues with hanging while updating presets. It also cannot control TCP hardware - which is the underpinning of the ATEM Software Control environment. Enter BitFocus Companion, which can trigger buttons via OSC, TCP, UDP, HTTP, WebSocket, and ArtNet. The set up could not be more straightforward, and the browser-based IP control is FAST. The programming cycle is around five times faster than when using TouchPortal, and most importantly - no more waiting on cues to trigger!
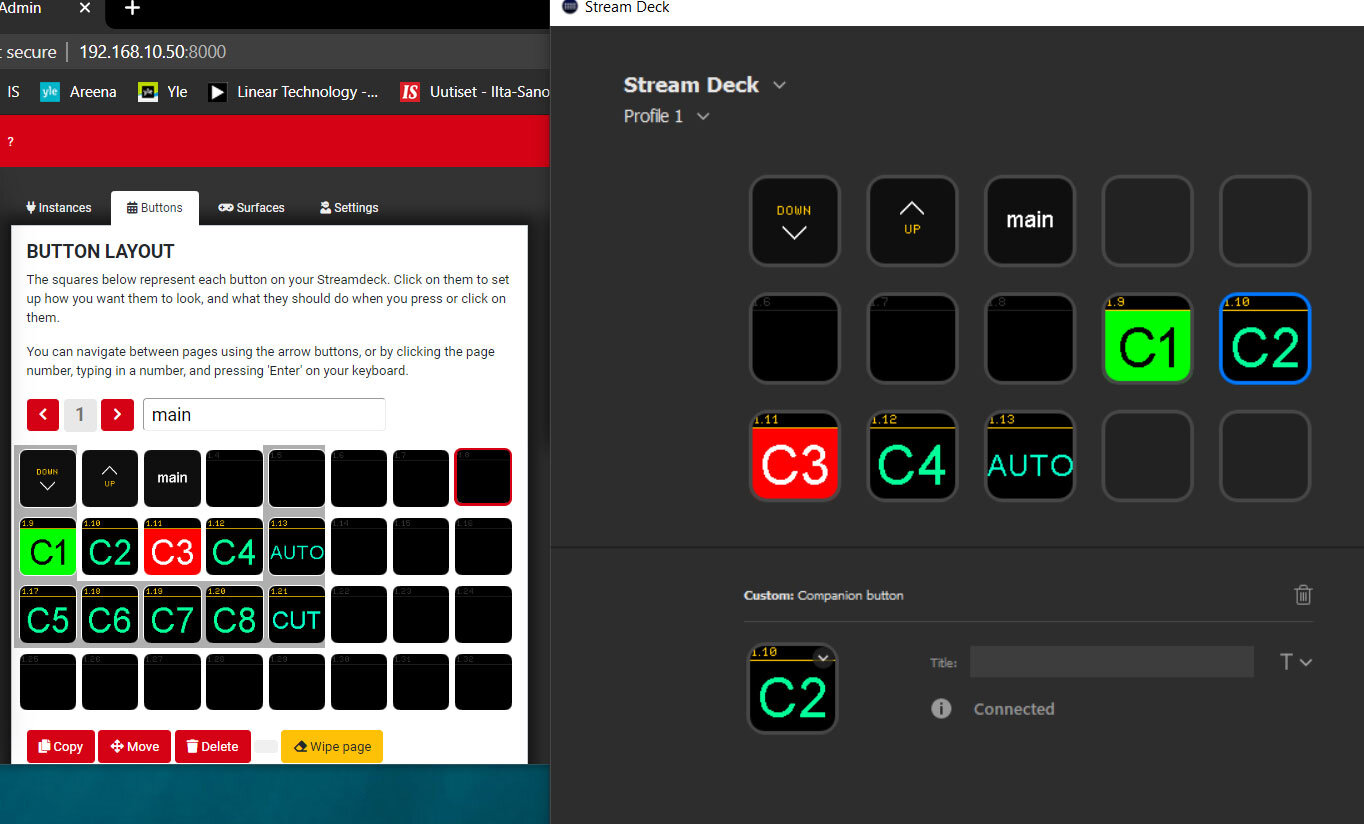
The drag & drop UI in BitFocus Companion is very nice!
What comes next?
Eventually, it may make the most sense to ditch laptops altogether and move to a couple of small form factor computers. These are generally cheaper, easier to upgrade, and have a longer service life. They could also be housed directly into my mobile networking rack, further simplifying setup!
The most significant trend that I'm seeing developing into 2021 is a move to fully-interactive broadcast events. Clients need to maintain the quality of their socially distanced virtual performances and also include opportunities for the audience to participate - with solutions going beyond chat windows, quizzes, and other text-based enhancements. They want to see and hear attendees in real-time while still having a professionally polished event.

The SK-RSDK Mlk. V in action at the Bellagio, for an Encore Productions event. I was still using TouchPortal for this activation.
Keeping The Live Experience Intact.
At first glance, integrating our presentation/studio stage workflow into Zoom, Skype, and similar conferencing application is easy. The USB-C interface on the ATEM Mini Pro allows for injection into any webcam source. Audio stingers and video playback/full-screen graphics can easily send through a second presenter via spotlighting. But advanced switching and video inserts require a few more steps. Prompting can even happen via solutions offered by outstanding technicians such as Michelle Michaelson over at Prompster. The new challenge is providing broadcast quality remote presenter services while enabling real-time audience video participation and interaction.

Another Zoom activation, this one at the Mirage for Encore Productions. Notice the most beautiful stage manager in the biz!
Maintain Control.
Some clients require broadcast graphics and display options for multiple remote presenters but cannot feasibly use a delayed broadcast feed (such as running Zoom into OBS/vMix/similar). Examples of this would be a behind the scenes tour, parlor concert, magic show, or a talk show set up as a Zoom call. The performers need to have immediate access to the faces and voices of the participants.
Zoom OSC is a fantastic solution created by Andrew Carluccio of Liminal Entertainment Technologies. Zoom OSC enables direct control of the Zoom application via Open Sound Control (which in turn can be controlled by BitFocus Companion, etc). This functionality allows for mixing sources, dynamic muting/spotlighting, and a bevy of other features. It's incredible, and it's free.

Kudos to Liminal Entertainment Technologies!
Liminal also offers StreamWeaver, which can transmit all sorts of show controls over the internet. I've just started working with Zoom OSC and am most excited about figuring out how to overlay lower thirds on to a remote presenter natively in Zoom!

Testing 1, 2, 3… My very cramped home setup.
To Infinity, and Online?
No matter what the crystal ball says about the future, the need for virtual event offerings is here to stay. I genuinely hope that live events come back in full force during 2021. When that happens, a significant portion of attendees will still be unable to meet in person for numerous reasons. Providing access is key to our shows' success, the retention of audiences, and most importantly, the mental health of everyone involved as we continue to distance and overcome the global pandemic.
Moreover, no man (or production company) is an island. I am so grateful to all of the outstanding professionals that have helped me devise and test my solutions. Thank you from the very bottom of my heart! I'd love to see your setups and hear more about your virtual and digital solutions. Let me know what you've been working on in the comments below!